
Before reading
I have submitted a pull request to the MicroPython GitHub repo, for the changes highlighted in this post to be included in future builds. It has been accepted since the original publish date of this post: https://github.com/micropython/micropython/pull/6840
However, the FAT driver is now baked into Pico/RP2040 builds - all you need to do now is drop sdcard.py onto the filesystem. The largest part of this post was recompiling MicroPython which, I believe it still stands as an OK guide for - as well as serving as a reminder to myself on how I approached this problem. For that reason, the rest of this post has been left unmodified since being published.
Preamble
The Raspberry Pi Pico is a new microcontroller from the Raspberry Pi Foundation. I won’t cover its features here, many other sources have already done a great job of this - check out the Tom’s Hardware article, and the official page from the Raspberry Pi Foundation.
One of the great things about the Pico is the availability of a public fork of MicroPython. It’s very much in its infancy, having been merged upstream less than a week ago on GitHub - as such, some of the features that are present in other MicroPython ports haven’t quite made their way to the Pico yet. In this article I’m going to focus on the steps necessary to compile MicroPython for the Pico, with support for an SD card over an SPI interface, and a FAT driver with support for both FAT16 and FAT32. If you already have a MicroPython build environment, skip to the “Customising the Pico Port” section.
Compiling MicroPython
The steps to compile MicroPython are simple. This article assumes a Linux environment - go ahead and set up a VM if you don’t already run a Linux distribution, or these steps can also be followed on a Raspberry Pi. To start with we’ll build the MicroPython source as it exists, to validate our build environment, before making any of the changes necessary to support an SD card and the FAT filesystem.
First, it’s a good idea to create a directory to keep all Raspberry Pi Pico related checkouts in. The following instructions create a pico directory in your home folder.
1
2
3
$ cd ~/
$ mkdir pico
$ cd pico
Then, clone the MicroPython git repository. This instruction differs slightly from the Raspberry Pi Pico Python SDK documentation at the time of writing, in that it clones from the MicroPython main repository, rather than the fork owned by RaspberryPi. I believe the documentation will soon be updated to reflect this change, too, as the Pico port of MicroPython is now held upstream.
1
$ git clone https://github.com/micropython/micropython.git
Once the download is complete, the MicroPython source code should be available in a new directory called micropython. The MicroPython repository contains submodules to specific libraries it needs to run on a particular board (in our case, the RP2040/Pico SDK). Use the following commands to fetch these:
1
2
3
4
$ cd micropython
$ git submodule update --init -- lib/pico-sdk
$ cd lib/pico-sdk
$ git submodule update --init
To build MicroPython, you’ll need some extra packages. This article assumes a Debian-based system (Raspbian, Ubuntu, etc.). If you have previously set up an environment to build for the Pico with the C SDK, the following step is unnecessary.
1
2
$ sudo apt update
$ sudo apt install cmake gcc-arm-none-eabi libnewlib-arm-none-eabi build-essential
Now we have the necessary tools, we can begin compiling MicroPython. To start building, you’ll need to change directory into the root directory containing the MicroPython source code. If you’ve followed all the instructions so far, you’ll need to go up two directories.
1
$ cd ../..
First, MicroPython requires you build a specific bootstrap tool, which ships with the source code. This is relevant to all MicroPython ports, and is not specific to the Pico.
1
$ make -C mpy-cross
Now that’s complete, we can build the RP2040 specific port. Notice I include the -j4 parameter in the make command, this tells make how many processes it may run simultaneously - 4 processes in this case. You could change this to a different number based on the number of cores/threads available on your system. The Raspberry Pi 4 has 4 cores with 4 threads, so this is a safe number. The system I use has 8 cores with 16 threads, so I use -j16 to allow make to fully utilise the resources I have.
1
2
$ cd ports/rp2
$ make -j4
If everything went well here, there should be a new directory called build within the ports/rp2 directory. Within this, there will be several files related to the build process. The most important of which is the firmware.uf2 file - this is the UF2 binary file, which can be copied to a Pico in BOOTSEL mode, that contains the MicroPython interpreter we’ve just built. The firmware.elf file is helpful too - it can be loaded by a debugger (e.g. gdb with openocd, instructions to achieve this can be found on the Raspberry Pi website, or maybe a following article will show how to achieve this with another Pico).
Go ahead and copy the newly built firmware.uf2 file to a Pico, and validate that it works. I prefer to use the Thonny IDE to do this, though you can use basically any serial terminal software. If you see a MicroPython prompt in your preferred IDE/serial terminal, you’ve succeeded in building MicroPython for a Pico.
Customising the Pico Port
Now we’ve validated that our MicroPython build environment works, and generates working code for a Pico, we can start customising the RP2040 MicroPython port to add native support for an SD card and the FAT filesystem. All of our work from here will focus on the ports/rp2 directory. If you’ve followed the instructions so far, your current working directory will already be set here.
Adding Python libraries - enabling SD card support
It is possible to add Python libraries to the build process, such that they are available permanently. Have a look at the manifest.py file, right now it’ll probably contain these three lines:
1
2
3
freeze("modules")
freeze("$(MPY_DIR)/drivers/onewire")
include("$(MPY_DIR)/extmod/uasyncio/manifest.py")
The freeze command adds a Python module, contained within a directory, to the MicroPython build. In the first line, we see the modules directory being “frozen” - this is the modules directory in the specific MicroPython port, in our case contained in the ports/rp2 directory. The majority of MicroPython ports contain a _boot.py file, which sets up the execution environment. Most often you’ll observe a root filesystem being mounted in this file.
The second line uses the $(MPY_DIR) environment variable. This expands to the root of the MicroPython source - in our case ~/pico/micropython - and can be used to include non-port specific drivers. If we browse the MicroPython root source directory, we can see an SD card driver in micropython/drivers/sdcard, containing sdcard.py and sdtest.py.
You may notice that the sdtest.py file is actually a test routine. We can use this code to test later, but it relies on working filesystem support, so we’ll look at this later in the article. Add this line to the manifest.py file to include, or “freeze”, the sdcard module.
1
freeze("$(MPY_DIR)/drivers/sdcard")
Now we’ve included the sdcard module, rebuild MicroPython. From the ports/rp2 directory, run the following commands.
1
2
$ make clean
$ make -j4
A new firmware.uf2 file will be generated. Place your Pico into BOOTSEL mode. This can be done within the MicroPython interpreter with the following commands.
1
2
>>> import machine
>>> machine.bootloader()
Copy the new firmware.uf2 file to your Pico, and reconnect your preferred IDE/serial terminal. Next, wire up your Pico to an SD card module. This article will assume you’re using the following pins, which are the default pins for the SPI0 interface in this port of MicroPython.
| Pico Pin | GPIO pin | SD module pin |
| 6 | GP4 (SPI0 RX) | DO |
| 9 | GP6 (SPI0 SCK) | CLK |
| 10 | GP7 (SPI0 TX) | DI |
| 34 | GP28 | CS |
Pico->SD card module wiring table
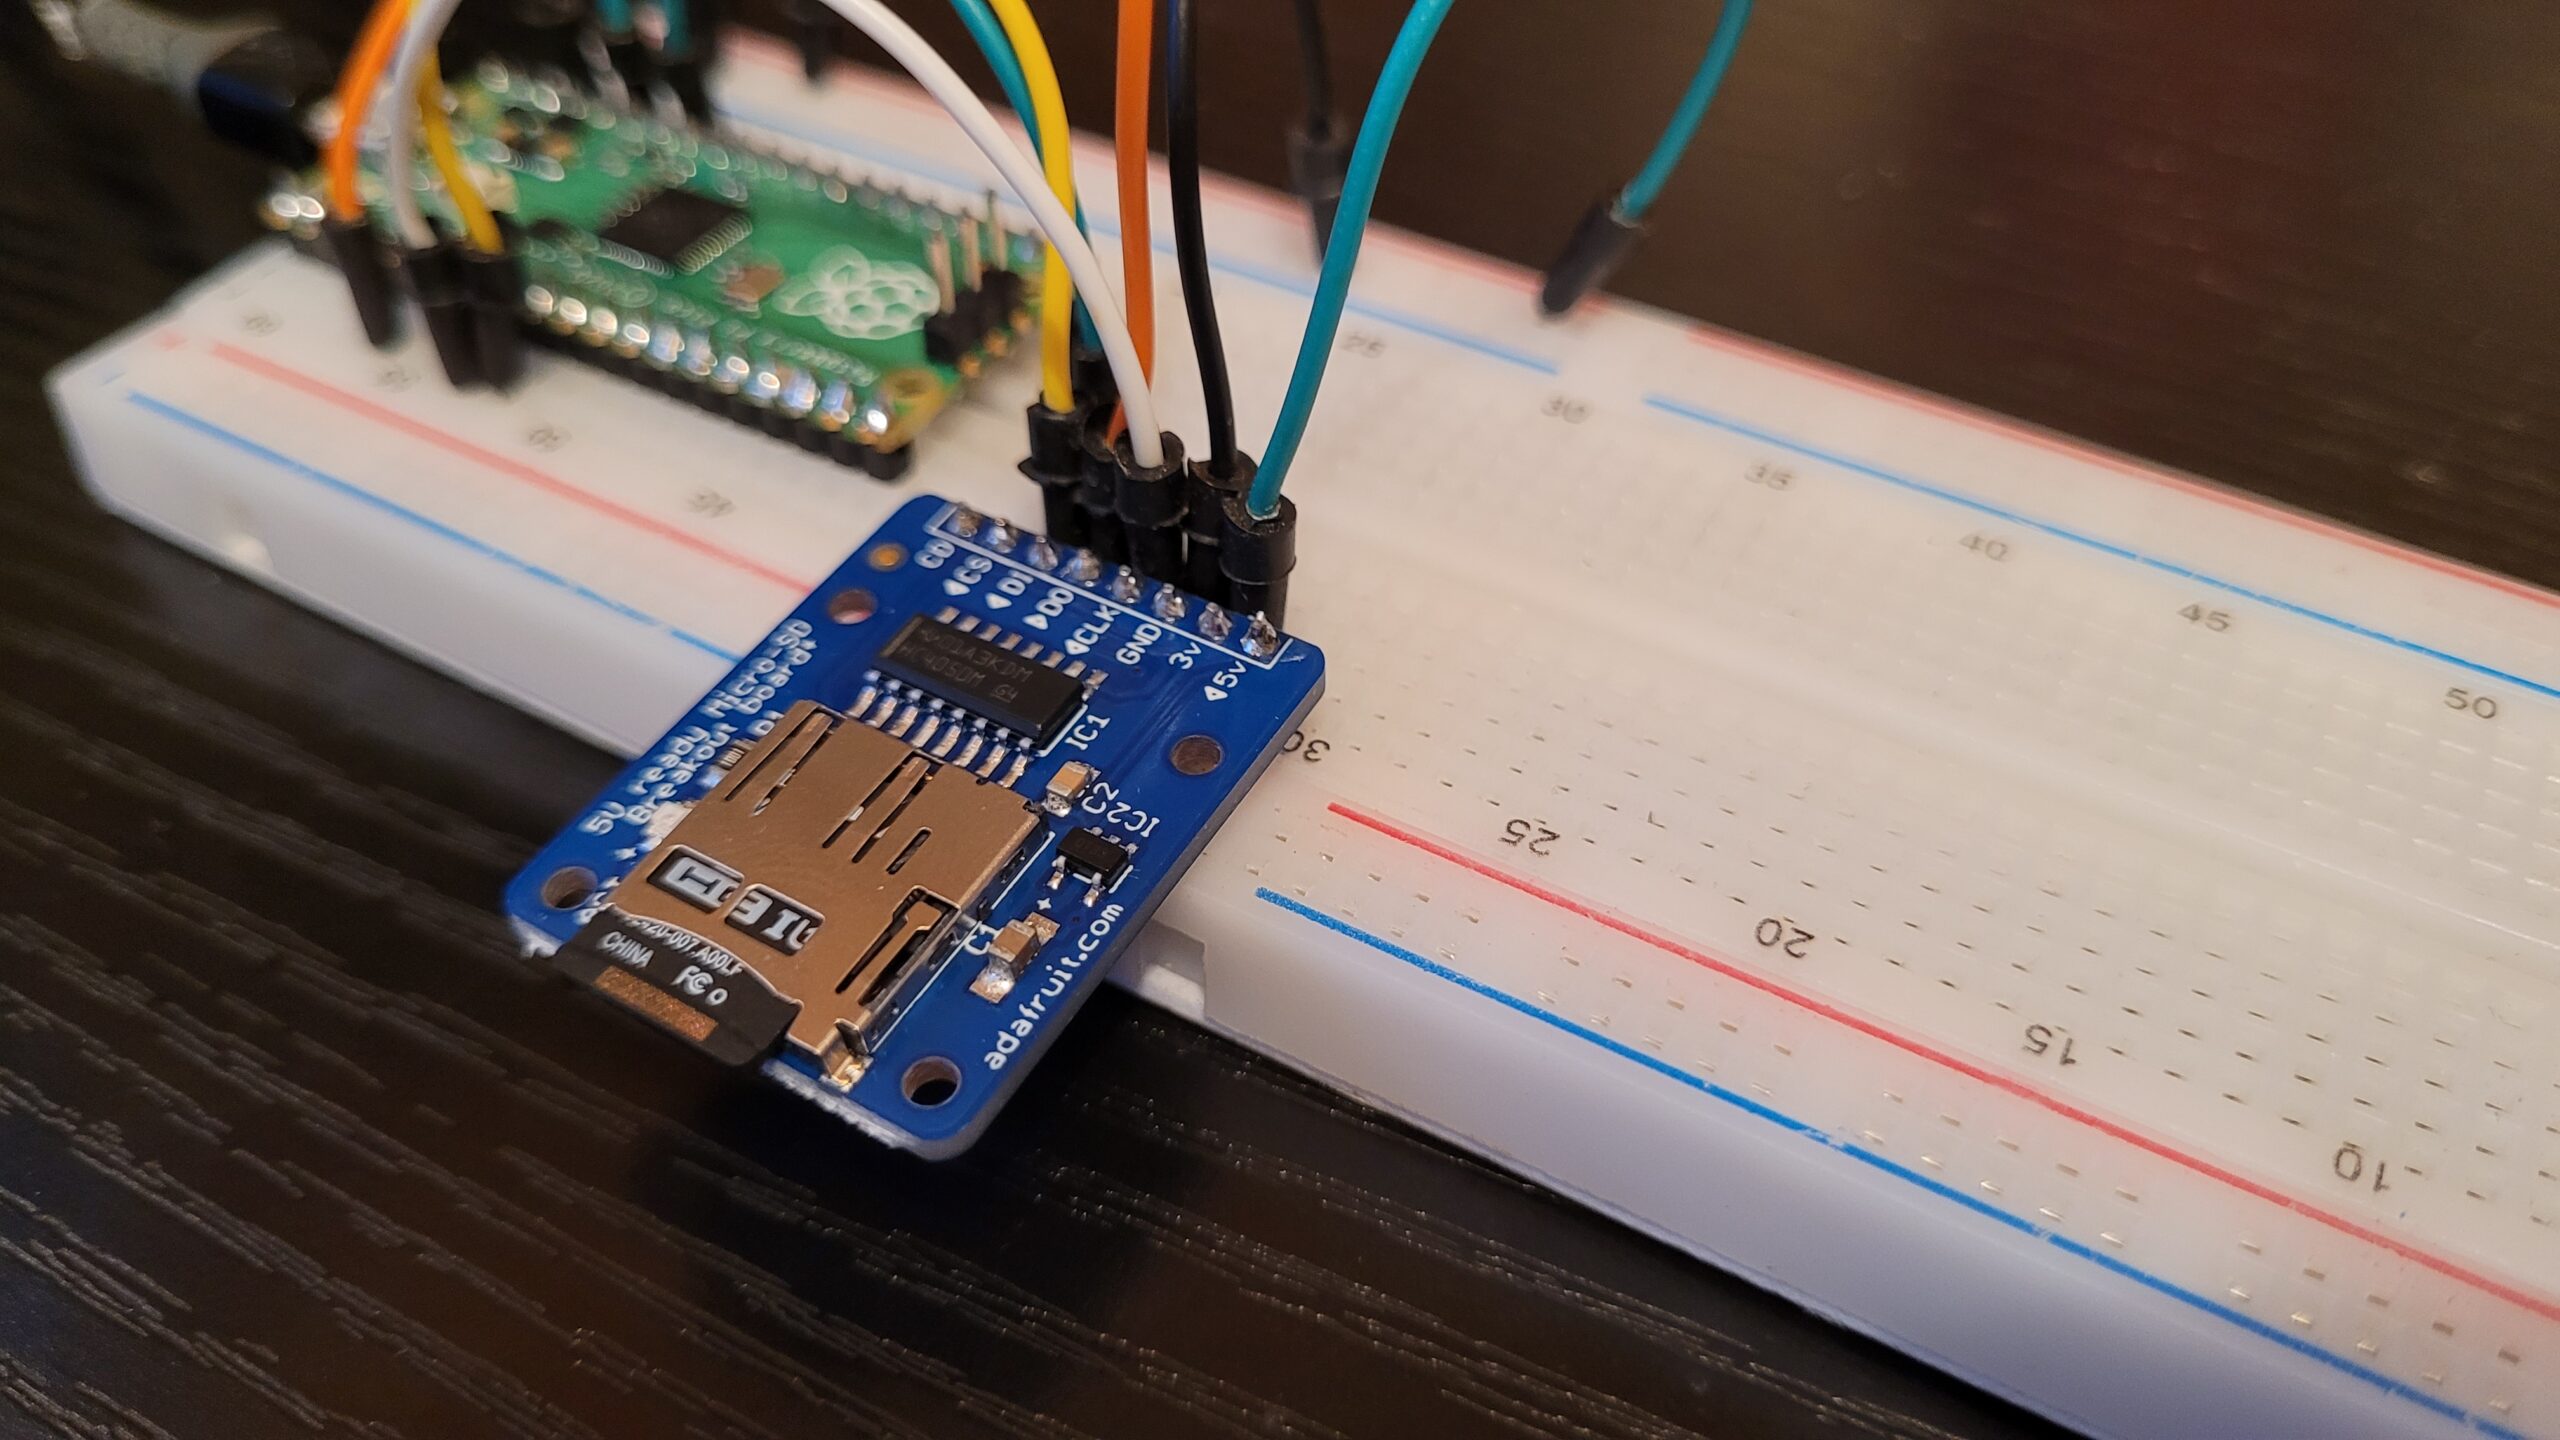
While wiring your Pico to an SD card module, you must use pins on the same SPI interface (SPI* RX, SCK, TX). However, the CS (Chip Select) pin is arbitrary and may be assigned to any unused GPIO pin. I’ve hooked my Pico up to an Adafruit Micro SD card breakout module.

Adafruit Micro SD card breakout module, hooked up to a Raspberry Pi Pico on a breadboard.
Once hooked up, it’s time to test we can read from the SD card! I’ve written the following program, which you could use to test. Important to note, is that the FAT filesystem still isn’t available to us, so we can only read raw data from the SD card.
1
2
3
4
5
6
7
8
9
10
11
12
13
14
15
16
17
18
19
20
from machine import Pin, SPI
import sdcard

def sdrawtest():
    sd = sdcard.SDCard(SPI(0), Pin(28))
    buf = bytearray(512)

    sd.readblocks(0, buf)

    for i in range(0, 512):
        if i % 16 == 8:
            print('    ',end='')

        if i % 16 == 0:
            print()
            print('{:04X}'.format(i), end=': ')

        print('{:02X}'.format(buf[i]), end=' ')

sdrawtest()
This program will read the first sector, often used as the Master Boot Record, from the SD card and output the contents in a hexadecimal format. While running it, a number of errors may occur - if this happens to you, double check your wiring, and try again. Otherwise, once satisfied that reading raw data is working, we can move onto the next step - compiling FAT support for MicroPython.
Adding C modules - enabling FAT support
MicroPython’s implementation of the FAT filesystem is written in C code, primarily in the micropython/extmod/vfs_fat.c file. Within a few lines, we can see the file requires MICROPY_VFS_FAT to be declared - and includes the py/mpconfig.h file, which in turn includes an mpconfigport.h file from the specific MicroPython port. In our case, the file is located in micropython/ports/rp2/mpconfigport.h. The Pico port’s version of this file is well documented, look for the section labelled “Extended modules”. At the time of writing the following two lines are at the end of the section.
1
2
#define MICROPY_VFS                             (1)
#define MICROPY_VFS_LFS2                        (1)
As we can see, VFS support is being compiled, as is LittleFS2. However, FAT is nowhere to be seen! Add the following line to this section, to enable compiling the FAT module.
1
#define MICROPY_VFS_FAT                         (1)
This is certainly enough to allow the build system to compile the vfs_fat.c file we looked at earlier. However, enabling this is not enough - the FAT implementation requires some supporting defines. Insert the following lines into mpconfigport.h, which I’ve derived from other MicroPython ports. Where exactly in the file matters little, but I’d recommend including them just after the “Extended modules” section.
1
2
3
4
5
// fatfs configuration
#define MICROPY_FATFS_ENABLE_LFN                (1)
#define MICROPY_FATFS_LFN_CODE_PAGE             437 /* 1=SFN/ANSI 437=LFN/U.S.(OEM) */
#define MICROPY_FATFS_RPATH                     (2)
#define MICROPY_FATFS_NORTC                     (1)
One of these defines may stand out, MICROPY_FATFS_NORTC. The RP2040 certainly does contain a Real-Time Clock. However, at the time of writing, RTC functionality for the RP2040 hasn’t yet been ported to MicroPython, although examples do exist in the Pico SDK. I’m not sure if the RTC in RP2040 is capable of ticking while the board is powered off, however, so enabling this support may not prove useful without access to a time server.
Now we’ve enabled the FAT filesystem driver, and provided some configuration, we can recompile MicroPython and test it works. Rebuild MicroPython using the same steps as before, and copy it to your Pico. Before we test the FAT implementation, ensure the root directory of your SD card has some files. The contents won’t matter for our test. With some files on your SD card, run the following program to test the FAT implementation, and list the files in the root of the SD card.
1
2
3
4
5
6
7
8
9
10
11
12
13
from machine import Pin, SPI
import uos

def fattest():
    sd = sdcard.SDCard(SPI(0), Pin(28))
    uos.mount(sd, '/sd')

    for name in uos.listdir('/sd'):
        print(name)

    uos.umount('/sd')

fattest()
If this program lists the contents of your SD card’s root directory, then our work is complete! We now have a MicroPython binary for the RP2040, compiled with support for SD cards and the FAT filesystem. Keep an eye out here for more content on the Raspberry Pi Pico!